How to check a new monitor for dead pixels and uniformity on a Mac
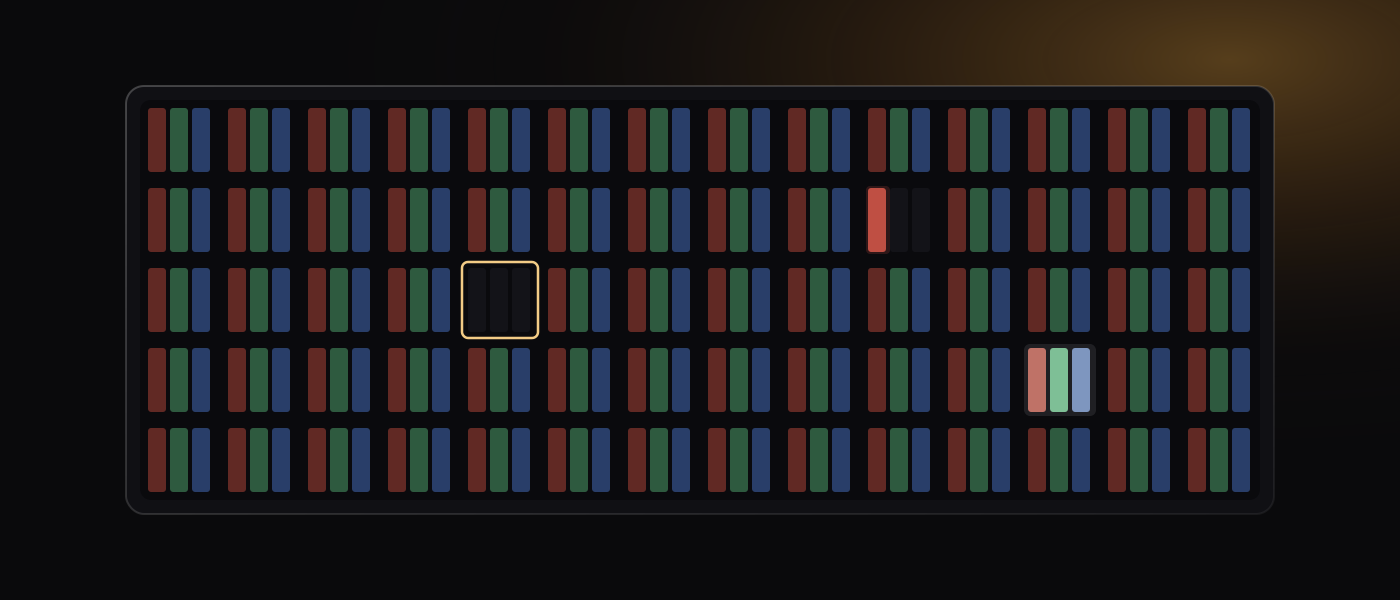
A display is the one thing on your desk that nothing inspects for you, and the first days of owning one are when a defect is a return rather than a warranty conversation. This guide covers what to look for on a new monitor, how to look using only what macOS already ships, what makers accept before they will exchange a panel, and how to keep a record.
Why the first days matter
Most warranties tolerate some number of bad pixels before anyone owes you a panel, so the return window, not the warranty, is the instrument that matters.
Return windows are counted in days and vary by retailer and by country, so check yours. Test the monitor the day it arrives, and keep the box until the window closes: some retailers ask for the original packaging.
Dead, stuck and hot pixels: what the difference is
On an LCD, every pixel is three subpixels, red, green and blue, each switched by its own transistor. Apple's article on LCD display pixel anomalies explains what goes wrong: a transistor that does not work perfectly leaves its subpixel stuck off (dark) or on (bright), and this occurs in a small percentage of panels. The three names matter, because policies are written in them.
- Dead: never lights, showing black on every colour including white. A single dead subpixel is subtler, reading as a slightly wrong colour.
- Stuck: one subpixel always on, so a red, green or blue dot, clearest on black.
- Hot: all three subpixels always on, so a white dot that stands out on black and vanishes on white.
Dead pixels are permanent: a transistor that will not switch is not going to start.
What makers accept
Most specifications inherit their class language from ISO 9241-307 and the withdrawn standard it replaced, ISO 13406-2, whose pixel fault classes sort panels by defects per million pixels: Class I is zero defects of any kind; Class II, the class most consumer panels have been sold under, allows two hot pixels, two dead pixels and five defective subpixels per million pixels.
Makers publish their own numbers, and those are what a support agent applies. Dell's display pixel guidelines define a bright pixel as one with all three subpixels permanently on and a dark pixel as one with all three permanently off, and allow, on a monitor without Premium Panel Exchange, up to five bright pixels or subpixels plus a number of dark subpixels that varies by model. On the lines that carry Premium Panel Exchange (UltraSharp, some Pro, gaming and Alienware) there is zero tolerance for bright pixels during the warranty, while dark subpixels stay tolerable. Check your own maker's page; this one does not transfer.
One bright pixel can be within policy on a budget panel and grounds for exchange on a premium one. The return window is the stronger lever either way.
Uniformity: backlight bleed, IPS glow and the dirty-screen effect
A panel can have no bad pixels and still be visibly uneven, and panel technology changes what you look for.
On an LCD the light comes from behind, so the faults are lighting faults. Backlight bleed is light escaping at the edges and corners, showing as pale patches on a black field in a dark room. IPS glow is a wash across a corner that shifts as you move your head. Clouding is broad, soft blotchiness across a dark field. Some amount of all three is normal.
On an OLED each pixel makes its own light, so bleed and glow do not apply. Near black is where banding or a vignette appears, which is why a 5% to 10% grey field tells you more than pure black.
On any panel, a 50% grey field shows the dirty-screen effect: faint vertical bands or blotches, like a smear on a window. A white field shows tint shift, where one region reads warmer or cooler than the rest.
How to look:
- Black in a dark room at the brightness you normally use, then white and grey in the room's usual light. Maximum brightness in the dark exaggerates bleed into something you will never see again.
- Straight on from where you sit, then once from an angle: what moves with your head is glow, what stays put is bleed or dirty screen.
- Compare the centre to each corner and edge in turn, rather than hunting a whole field for perfection.
How to test a monitor with what macOS already has
You do not need to install anything: just a full-screen field of one colour at a time, with nothing else on screen.
The quickest route is the desktop. Open System Settings, then Wallpaper, and pick a solid colour from the Colors section; Custom Color opens the picker for an exact value. Hide the Dock and the menu bar so nothing lights the edges, and close every window; the labels for hiding both are in the OLED burn-in guide. A single-colour image opened in Preview and shown with View, Enter Full Screen works too.
First turn off the two things macOS does to colour on your behalf, both in System Settings under Displays: open Night Shift… and set the schedule to Off, and switch off True Tone if the display offers it. Both shift the panel's tint, which is exactly what you are assessing. Turn them back on afterwards.
Then work the fields in order. Black first, in the dark, for bleed and for stuck or hot pixels. Then red, green and blue in turn: a dead subpixel hides on white and on the other two primaries but shows plainly on its own colour. Then a mid grey, then white.
On an OLED, do not leave the white field up for long. A few seconds on each region tells you what a minute would. A solid, full-screen, high-brightness field is exactly the static content that wears an OLED unevenly, and a test should not cost you the thing it is testing for.
A structured checkup
Going through the fields by eye catches an obvious defect. A fixed protocol adds repeatability: the same fields in the same order, so a recheck in a year is comparable; a cap on how long each field stays up, so the test does not itself leave a static image on an OLED; and a record written while the return window was open.
Candela is a free, open-source macOS menu-bar app, and its Checkup is that protocol. It shows black, red, green, blue, 7% grey, 50% grey, a gradient and white, in that order, each field capped at 20 seconds (white at 10) and shown at most three times. Before the fields it tells you it will plant one small mark at a position it will not reveal, and asks you to click it when you see it, so the report can say how sensitive your eyes were. If the first mark is not found the field is shown again with a larger one, and if an 8 pixel mark is missed as well, the colour fields are recorded as inconclusive rather than clean.
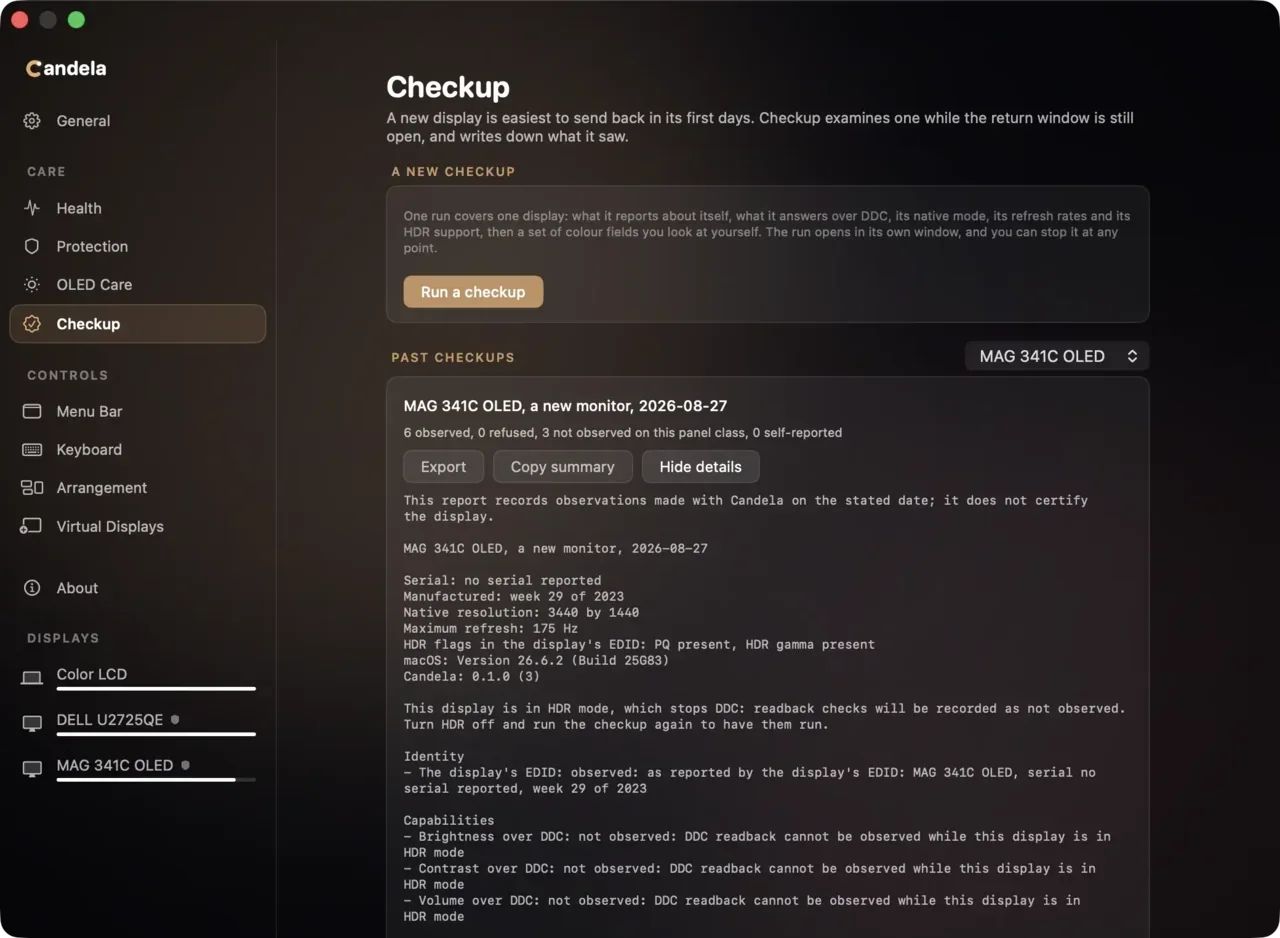
Every claim in the report is graded as observed, refused (the display was asked and said no), not observed, self-reported (what the display claims about itself) or inconclusive. There is no overall pass or fail, and it does not certify a panel. The report stays on your Mac and exports as a file carrying a hash of its own contents; nothing is uploaded. The flow is documented in how Checkup works.
What to do if you find a defect
Gather evidence before you contact anyone.
- Photograph it on the solid field it shows on, from where you sit, and note the room's lighting. A stuck pixel on a black field photographs legibly; over a cluttered desktop it does not.
- Write down where it is. "A dead pixel about 4 cm in from the left edge, a third of the way down" gets a different response from "a dead pixel".
Then go to the retailer, inside the return window, before the maker's warranty line. A return does not ask you to argue your pixel count against a published tolerance; a warranty claim does.
'%20stroke-width='126'%20stroke-linecap='round'/%3e%3ccircle%20cx='685.6'%20cy='305.2'%20r='165'%20fill='url(%23tip6)'/%3e%3ccircle%20cx='685.6'%20cy='305.2'%20r='56'%20fill='%23FFFDF4'/%3e%3c/svg%3e) Candela
Candela
The display software Apple forgot to ship.
- Panel health
- Burn-in protection
- Monitor checkup
- Every control